#325: First Steps With LangGraph
Agents in LangChain allow us to use the LLM as a reasoning engine and take actions based on their abilities. We used them successfully with our CSV files or when we queried a database. However, while we get a lot of flexibility, we often wish for a middle ground that gives us not only flexibility, but a bit more control on what is going on.
We can use LangGraph for this purpose. This low-level orchestration framework allows us to build simple agents or direct a large network of independent agents to solve problems for us. Let us get started with the most basic part and add from there.
Installation
For our examples we need Python 3.13 and these packages in the newest version:
Build the first graph
To build our first graph, we need a State object to keep a place for the shared memory. This is the place that allows us to pass messages and data between the nodes in our graph. Without the state, our nodes could not communicate with each other. By using the type system of Python we help LangGraph to understand what data is expected and end up with less ambiguity.
While we do not strictly need an LLM, we use it in this example to keep it consistent with the other LangChain examples. I use a local LLM that runs inside of LM Studio, but you are free to use your favourite LLM.
To access the LLM in our graph, we need to wrap it in a function (call_llm). We then can build our graph and add our call_llm function as a node to our graph. We need to connect this node with edges to the pre-defined nodes START and END. That way LangGraph knows how to reach our function.
We finish our script with compiling the graph, invoke our question on it and print the result to the command line:
What did we gain?
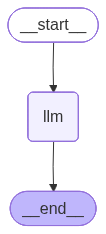
When we print the graph we created in our demo script, we get an image like this one:
We will use a dedicated post on the various options we have to visualise our graphs with LangGraph.
This is the smallest example we can build with LangGraph. We connect our function to the START and END node and run straight through our graph. No decisions, no circles, no excitement. But this ground structure is the basic of LangGraph and when we got this part running, we can add more complex and interesting capabilities.
Next
We created our first LangGraph application. While this on its own is boring and does not add much value, it is the basic of the LangGraph framework that we can use to build much more exciting things. As our next step we explore how we can add conditional logic to our graph.